Most people who buy a pizza oven quit after three pies. The first one sticks to the peel, the second burns on the bottom before the cheese melts, and the third goes in the trash while the box is still in the garage. Learning how to use a pizza oven is not really about the recipe. It is about heat: how much the stone has stored, where that heat sits, and how fast you move once the dough touches it.
I cooked the oven at a Neapolitan pizzeria for five years before I switched to writing about food, and I have worked through 8 pizza ovens over the last 3 years, from a countertop box to a dome that cost more than my first car. Every pie gets scored on the same crust scorecard: char, leoparding, rim rise, bottom crisp. The ovens change. The scorecard does not.
The two ovens below sit at opposite ends of the same job. One is a countertop electric that lives next to the toaster for Tuesday nights. The other is a multi-fuel outdoor unit for Saturday. Both will make good pizza if you run them the same way. Both will make bad pizza if you don't.
Why you should trust me
I have been on the oven side of this business, not the marketing side. Five years of dinner service taught me that a pizza oven is a heat machine, and that everything else (the dough, the sauce, the cheese) is just there to not get in its way. When a dough hits a stone that is actually at temp, the bake takes 90 seconds and the crust tells you everything. When the stone is at 550F and the box says 700F, you get a pale, leathery disc and a bad mood.
I keep an infrared thermometer in my apron pocket and a dated prediction list on my desk. I do not quote a temperature I have not read off a stone. If a manufacturer prints a number on a box, that number is a claim, not a measurement.
How I picked and how I tested
I did not buy these two because of a spec sheet. I put them here because they answer the two questions a home cook actually asks: can I make pizza on a weeknight without lighting anything, and can I make pizza outside on a weekend without buying a second oven's worth of accessories.
Here is what I check before an oven earns a spot on this page:
Stone temp, verified. Not the display, not the dial. I point an infrared thermometer at the middle of the stone and at the edge, and I compare. A stone that reads 750F in the center and 500F at the rim will give you a pie that is burnt in the middle and raw at the edge.
Preheat time that fits a real night. If an oven needs 40 minutes to be ready, it is a weekend oven no matter what the box says. Both of the ovens here fall inside a window that works for a weeknight.
Recovery between pies. The second pie is the real test. A stone that dumps all its heat into pie one leaves you waiting 10 minutes for pie two.
Footprint. Counter space and patio space are both finite. A 12-inch oven that you actually leave out gets used more than a 16-inch oven you have to drag from the garage.
What comes in the box. A stone and a peel included means you are not making a second order before your first bake.
Both ovens below cleared those checks. Neither one is a $900 dome, and neither one needs to be.
Pick your heat source first
Before the dough, before the sauce, decide where the heat comes from. That decision drives everything else, including which night of the week you actually use the thing.
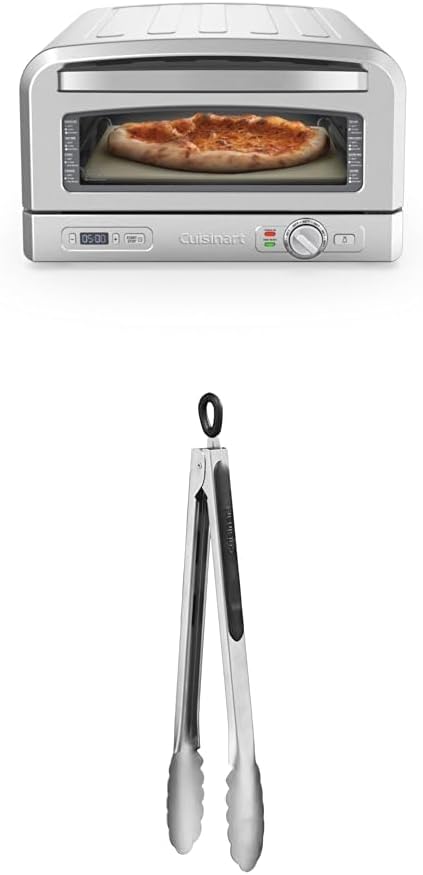
The indoor pick: Bundle of Cuisinart Indoor Pizza Oven, Portable Countertop Pizza Oven that Bakes 12" Pizzas in Minutes, Stainless Steel, CPZ-120 + Cuisinart CTG-00-12TNG 12-Inch Tongs
 Visit on Amazon →
This is the weeknight answer. It is a countertop electric that bakes 12-inch pies, which means no fire, no propane, no weather, and no decision-making at 7pm on a Tuesday. The bundle throws in a pair of 12-inch tongs, which sounds like a throwaway until you are trying to pull a hot pie off a stone without a peel in reach.
The honest framing: an indoor electric oven is a heat machine with a ceiling. It will not hit the stone temps a live fire hits, so you are not going to get the 60-second Neapolitan bake with heavy leoparding. What you get instead is repeatability. The same setting produces the same result on a Tuesday in February as it does in July, and that is worth more than a temperature number you cannot control.
Flaws but not dealbreakers: Countertop electrics take up real estate and they warm the room. Give it clearance on all sides, and do not park it under a cabinet. Also, this class of oven rewards a lower hydration dough. If your dough is wet and slack, drop the water back rather than blaming the oven.
Anyone who wants pizza on a weeknight without a fire, a hose, or a coat should start here.
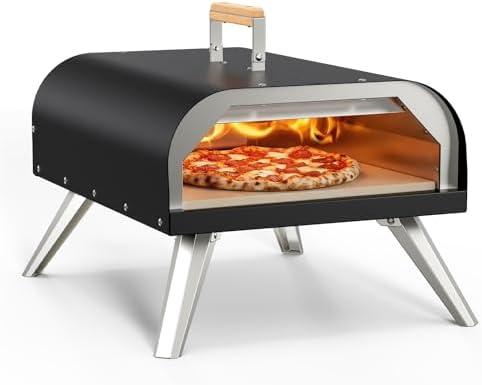
The outdoor pick: WOOCIT 12" Multi-Fuel Outdoor Pizza Oven, Reaches 720°F, with Stone & Peel
 Visit on Amazon →
This is the Saturday oven. It is a 12-inch outdoor unit that the manufacturer rates to 720°F, and the multi-fuel design means you are not locked into one heat source. It ships with a stone and a peel, which matters more than people expect: the peel is the accessory that ruins the most first bakes, and a peel with no lip is a peel that dumps your dough onto the floor.
Read the 720°F as a manufacturer claim and verify it yourself. Point an infrared thermometer at the stone before the first pie. If the stone reads what the box promises, you have a fast bake. If it reads 100 degrees under, you adjust with a longer bake and a slightly drier dough instead of arguing with the oven.
Flaws but not dealbreakers: Outdoor ovens live and die on preheat discipline. Twenty to thirty minutes of preheat feels like forever when you are hungry, and it is also the difference between leoparding and a pale rim. Also budget for wind. An outdoor oven in a crosswind loses stone temp faster than the same oven on a still evening.
Anyone who wants a weekend ritual and a higher ceiling on stone temp should look here.
The actual workflow
This works on both ovens. The steps are the same. The timing changes.
Step one: Start the preheat before you start anything else. Not after you stretch the dough. Before. Turn the oven on, or light it, then go make your dough balls. The oven needs 15 to 30 minutes depending on the class, and the stone needs all of it.
Step two: Verify the stone with an infrared thermometer. Point it at the center of the stone, then at the edge nearest the heat source, then at the edge farthest away. Write nothing down, just look at the spread. A 40 to 60 degree spread is normal. A 200 degree spread means you need more preheat time, or you need to rotate the stone.
Step three: Bring the dough to room temp. Cold dough from the fridge fights you on the stretch and steams in the middle of the bake. Pull your dough balls out 60 to 90 minutes before the first launch. Cover them so they do not skin over.
Step four: Flour the peel, not the dough. A dusting of semolina or a 50/50 mix of flour and semolina on the peel. Shake the peel between toppings. If the dough does not slide when you shake it, lift an edge and blow under it, or start over with a fresh dusting. Launching a stuck pie is how you get a calzone.
Step five: Keep the topping load light. A 12-inch pie is not a delivery pie. Two to three ounces of cheese and a thin layer of sauce. Heavy toppings insulate the dough from the stone, and the stone is the whole point.
Step six: Launch with confidence, in one motion. Line the back edge of the peel up with the back of the stone and slide forward, pulling the peel back as you go. Hesitation is what tears a dough.
Step seven: Turn, don't stare. A fast bake gives you roughly 20 to 30 seconds before one side starts to take color. Turn the pie a quarter turn, wait, turn again. The turn is the single skill that separates a good home pie from a burnt one, and it is the skill nobody practices.
Step eight: Pull when the rim has risen and the bottom has set. Lift an edge with the peel and look. Leoparding on the rim and a bottom that holds flat when you lift it. If the top is set but the bottom is pale, the stone was not hot enough.
Step nine: Let it rest 60 seconds. Not for the crust. For your mouth. A pizza oven pie at 30 seconds out of the stone will take the roof off your palate.
Where the first pies go wrong
The first pizza you make in a new oven will be bad. Plan for it. The second one tells you what you bought.
The three failures I see over and over are under-preheat, too much water in the dough, and a stuck peel. Under-preheat is the most common and the easiest to fix: add 10 minutes and re-check the stone. Too much water shows up as a gummy center with a burnt rim, and the fix is dropping your hydration rather than changing ovens. A stuck peel is a technique problem, and the fix is shaking the peel before every launch, not buying a $40 accessory.
One more caveat that nobody mentions: thermostat dials on cheap ovens lie, and they lie in both directions. Trust the infrared thermometer on the stone, not the number on the dial. That habit alone will improve your pies more than any upgrade under a few hundred dollars.
The competition and why it lost
I did not include a big 16-inch gas oven or a premium dome here, and that is deliberate. A 12-inch oven that hits real stone temp beats a 16-inch oven that struggles to get past 700F, because temperature range is the spec that matters and capacity is the spec that sells.
The premium tier is a different article and a different budget. Those ovens are built like restaurant equipment and priced like it. If you are spending that kind of money, you already know why you are spending it. For everyone else, the question is simpler: indoor electric or outdoor multi-fuel.
I also left out the accessory aisle. Half the accessories sold for pizza ovens are solutions to problems you do not have yet. A peel and an infrared thermometer cover most of it. Everything else can wait until you have made 10 pies and know what actually annoys you.
What you actually need to buy
The oven is the purchase. The rest is small.
Start with an infrared thermometer. It is the cheapest tool in this entire guide and the one that changes the most outcomes, because it turns a guess into a reading. Then a peel, which the outdoor oven here already includes. Then a dough recipe you have made 10 times.
The oven gets the credit, but the dough does the work. A 48-hour cold ferment in your fridge will do more for your crust than any upgrade under $300, and it costs you nothing but planning. Once the dough is reliable, the only variable left is stone temp, and that is a number you can read.
Check current Amazon price on both ovens before you commit, and check what each one includes in the box. The indoor bundle throws in tongs. The outdoor unit throws in a stone and a peel. Both of those are the kind of included gear that saves you a second order and a week of waiting.
Do the first bake on a night when nobody is hungry and nothing is riding on it. That is the pie that teaches you the oven. The one after that is dinner.