Most people buy a gas pizza oven, fire it up, slide in a pie while the air is hot and the stone underneath is still cold, then blame the oven for a crust that came out blond and limp. The oven was not the problem. The routine was. A gas pizza oven is a heat machine with exactly one job, and that job is to push heat into a stone and then into your dough in under two minutes. Everything in this guide is about getting the stone hot, keeping it hot, and knowing when to stop.
I worked the oven line at a Neapolitan pizzeria for five years before I switched to food writing, and the thing that separated a good night from a bad one was never the recipe. It was whether the floor of the oven was ready when the first pie went in. A backyard propane oven has the same problem in a smaller box. The burner heats the air fast. The stone lags behind by 15 to 20 minutes. Launch too early and the top chars before the bottom sets, which is the single most common way a home pizza night goes wrong.
So here is the whole routine, from assembly to shutdown, plus the two pieces of gear I would actually spend money on alongside it.
Why you should trust me
I spent five years on the oven line at a Neapolitan pizzeria, measuring dough by feel and pulling pies in about 60 seconds. Since then I have tested 8 pizza ovens over 3 years, from a $60 countertop box to a $900 wood-fired dome. I score every pie on the same crust scorecard: char, leoparding, rim rise, bottom crisp. I keep the photos, because a scorecard without photos is just a mood.
I also own an infrared thermometer and I do not trust a dial. If a box claims 900F and my gun reads 620F at the stone, I write down 620F. That habit is the reason half the setup advice below exists.
How I picked and how I tested
This is not a roundup of every oven on the market. It is a setup guide for one class of oven: the portable propane oven with a built-in stone, the kind you set on a patio table and light with a knob. That class covers most of what people actually buy, and it has a specific and predictable set of failure points.
When an oven comes through my kitchen it gets at least 8 pies before I form an opinion. The first two are throwaways, and I mean that literally. The first pizza in a new oven is always bad. It is not dinner, it is reconnaissance. It shows you where the hot spot sits, how fast the stone recovers, and how quick your launch has to be. The second pie tells you what you bought. Pies three through eight tell you whether you can repeat it on a random Tuesday.
For this guide I kept two questions in front of me. Does the oven hold stone temperature through a full dinner service, meaning four to six pies back to back? And does anything on the outside rust, seize, or quit after a season on a patio? The second question is the reason a cover is in this article at all. It is not a glamorous purchase. It is the one that decides whether the oven still lights in year three.
The two things you need before the first pie
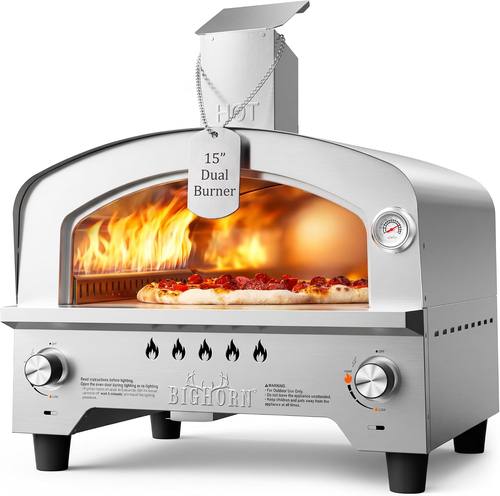
The oven: BIG HORN Gas Pizza Oven, Portable Propane Pizza Oven with 15 inch Pizza Stone, Stainless Steel Pizza Maker for Outdoor Cooking
 Visit on Amazon →
This is the exact class of oven the whole guide is built around: a propane burner, a stainless body, a 15 inch stone already in the box, no fire to tend and no pellets to feed. The stone size is the spec that matters most here, because stone diameter sets your ceiling on pie size. A 15 inch stone comfortably takes a 12 to 13 inch pie with room left over to rotate it, and 12 to 13 inches is the size where you can get real rim rise without the center going soupy before the bottom sets.
The part I like for a weeknight is the ignition. You turn a knob, you get flame, and roughly 20 minutes later you are cooking. There is no chimney to warm and no wood to split, which is the entire argument for gas on a Tuesday. The part I do not like is common to every oven in this class: the body is thin, so wind pulls heat off the top of the dome. On a breezy night you will fight it, and the fight is not worth having. Set the oven behind a railing, a wall, or the corner of a garage and you get most of that heat back without touching the dial.
Flaws but not dealbreakers: Portable stainless ovens are light, and light means they slide. Put it on a surface that does not wobble when you lean into it with a peel. If your patio table flexes, move to a sturdier table before you cook.
Anyone who wants pizza on a Tuesday without lighting a fire will get along with this format. If tending a fire is the point for you, buy a wood oven and read a different guide.
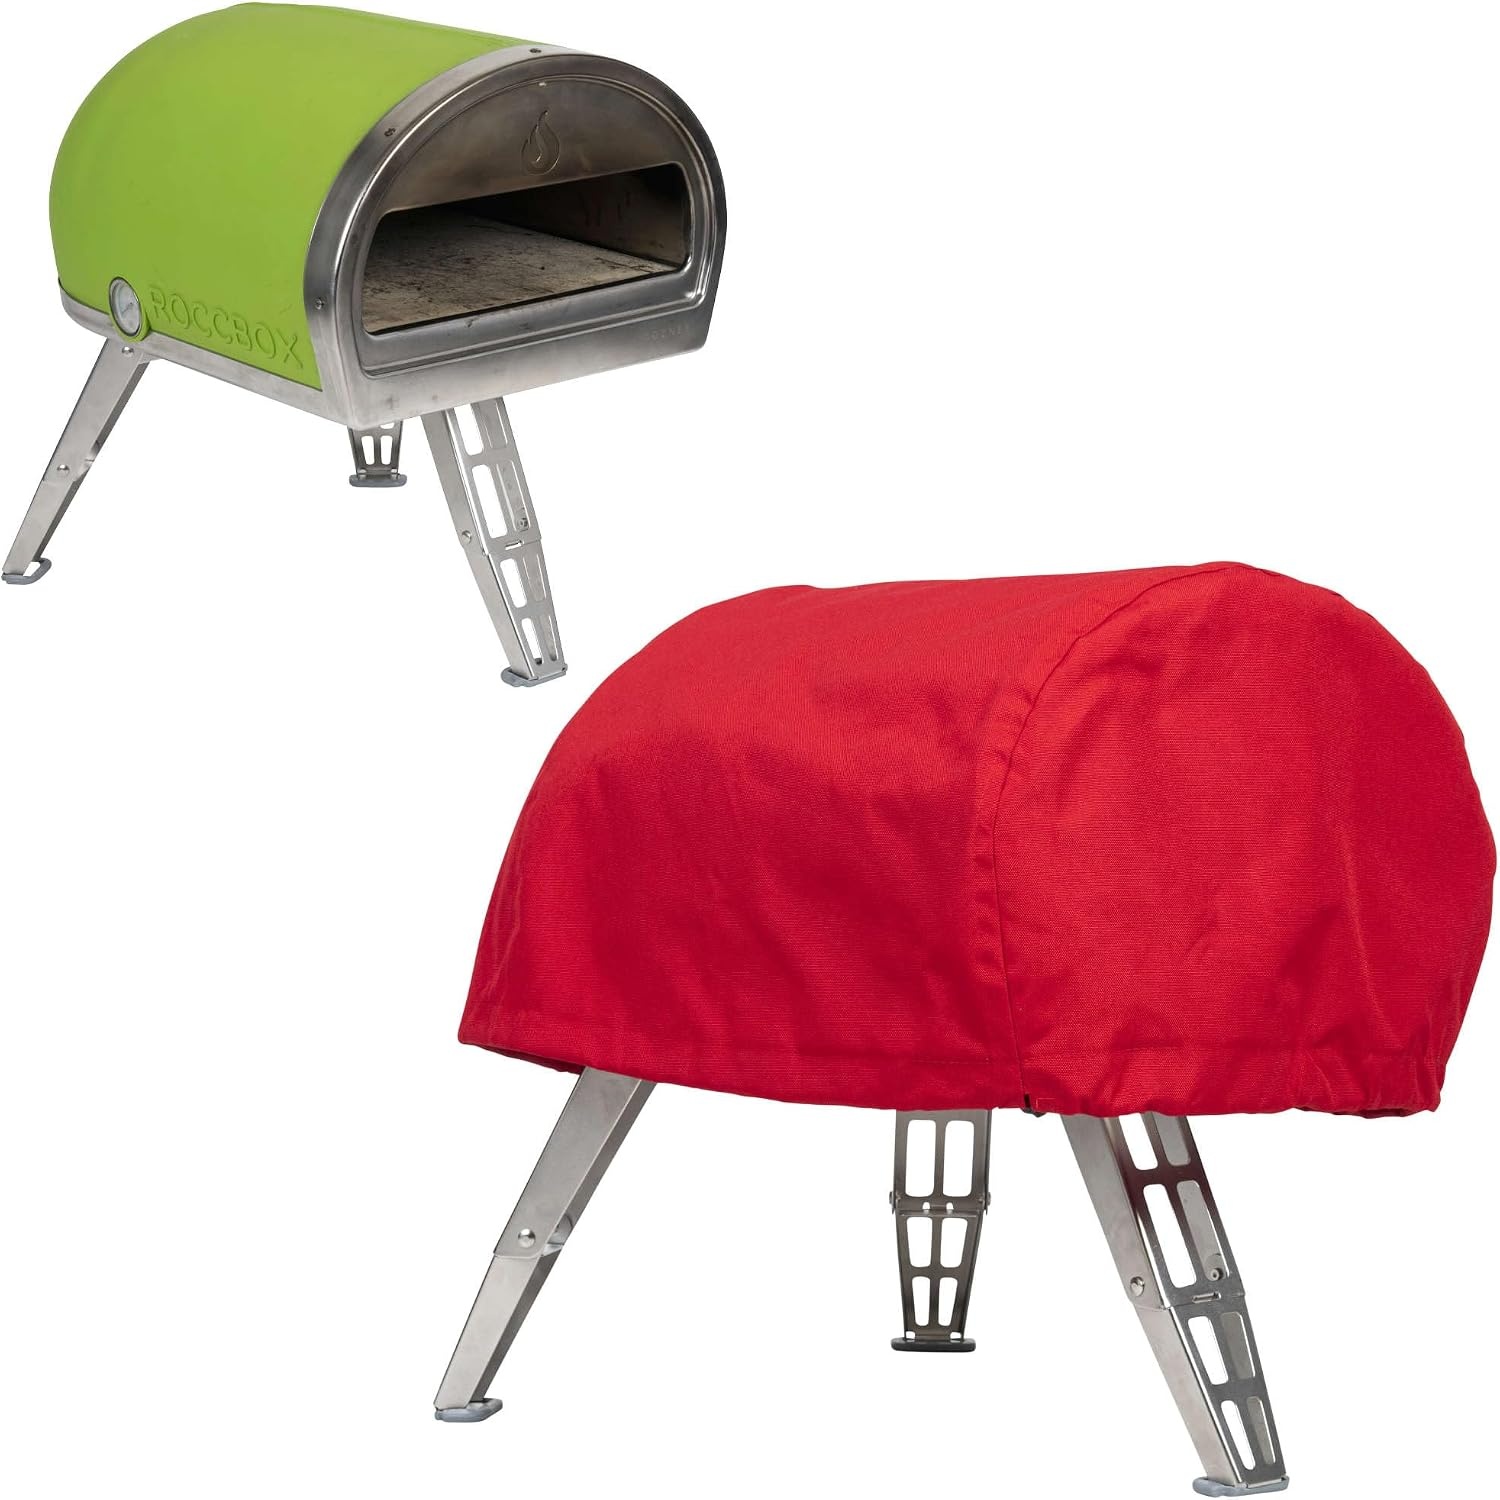
The cover: Pizza Oven Red Cover Waterproof Protective Bag for outdoor pizza oven for Gozney Roccbox
 Visit on Amazon →
A cover sounds like the least interesting item in an outdoor cooking setup, right up until the second winter. Burner tubes rust from the inside. Knobs seize. The ignition button is always the first thing to quit, and it quits on a night when you have guests. Half the accessories sold for pizza ovens are solutions to problems you do not have yet. A cover is not one of those. It solves weather, which you definitely have.
This one is cut for a Roccbox, so measure your oven's footprint before you order rather than after. It is a fitted bag and not a loose tarp, which is the right call. A fitted cover sheds water off the sides. A sagging tarp pools water in the middle, and pooling water is what actually kills a burner over a season.
Flaws but not dealbreakers: A fitted cover fits one shape. If you keep two ovens outside, you are buying two covers. Also, it goes on a cold oven only, never a warm one.
Anyone leaving an oven outside on a patio, a balcony, or a fire escape should own one. It is the cheapest insurance in the whole setup, and it protects the most expensive part.
The setup workflow, step by step
Now the part you came for. This sequence works on any portable propane oven with a stone, and it works the same way in October as it does in July.
Step one: Assemble it once and leak check it. Connect the regulator to the tank, then brush soapy water on the hose connections and the regulator joint. Open the tank valve slowly and watch for bubbles. Bubbles mean a leak, and a leak means stop. Do this once at the start of the season and again any time you reconnect the tank. It takes two minutes and it is the only genuinely dangerous step in the whole process.
Step two: Dry the stone before you cook on it. A new stone holds moisture from shipping and from storage. Put it in the oven cold, run the burner on low for 20 minutes, then medium for 20, then high for 10. Cracking a stone comes from thermal shock, not from heat, so the ramp is the point. Do this once when the stone is new, and again any time the oven has sat outside through a wet month.
Step three: Preheat longer than you think. Twenty to 30 minutes on high with the lid closed is the floor, not the ceiling. The air inside hits temperature in about five minutes and that reading will lie to you. The stone is the slow part. In cold weather, add 10 minutes to whatever you planned.
Step four: Check the stone, not the dial. Aim an infrared thermometer at the middle of the stone, not the edge near the burner, and not the dome. The middle is where the pie sits. For a fast Neapolitan-style bake, you want the floor in the 700F to 800F range. For a New York style pie that bakes longer and crisper, 550F to 650F is the window. If you do not own a gun, hold your palm two inches above the stone. If you can hold it there for three seconds, the stone is not ready and you should walk away for another five minutes.
Step five: Launch in one motion. Flour the peel, build the pie on the peel, and shake it once to confirm it moves. Then go in one confident push, angled slightly down, all the way to the back. Hesitation is what turns a pizza into a calzone. A peel with a lip helps here, and a peel with no lip is a tool I will complain about in any article I am allowed to.
Step six: Rotate, do not fiddle. Twenty to 30 seconds in, give the pie a quarter turn with a turning peel. Two or three turns total and it is done. Opening the lid to stare at it dumps heat out of the dome, and the dome heat is what gives you leoparding on the rim. Cook with the lid closed and your eyes on a timer.
Step seven: Shut down in the right order. Burner off first, then the tank valve, then let the whole thing cool completely before anything goes near it. The stone needs a slow cooldown for the same reason it needed a slow warm-up. Once it is cold, the cover goes on. Covering a warm oven traps moisture against the steel, which is exactly the thing you bought the cover to prevent.
Where the flame setting goes wrong
Almost everyone runs the burner wide open the entire time. That is correct for preheat and wrong for the bake. On most propane ovens you want a strong rolling flame during the bake, not a blast that scorches the dome. If your rim is blackening before the bottom sets, drop the flame one notch and give the stone more time to recover between pies.
The other mistake is not letting the stone recover. Back-to-back pies pull heat out of the floor, and the third pie of the night is usually the worst one because the cook never gave the oven 5 minutes to catch up. If you are feeding six people, cook two pies, then wait five minutes with the burner on high. That pause is not downtime, it is maintenance.
And a note on temperature claims, because this is my least favorite subject. Ovens that advertise a number on the box and top out well below it are the reason I carry a thermometer. Trust the stone, not the marketing.
The competition and why it lost
Wood ovens and indoor electric ovens both have a place, and neither is this guide. A wood-fired dome is a Saturday project: you split, you stack, you tend, and you get a flavor and a char that gas will not give you. If that ritual is what you want, you already know it, and no setup guide will talk you out of it. The Ooni Karu is built for that person. Gozney's Dome is the best oven I have tested and its price says so out loud.
Indoor electric ovens are the opposite answer, and I think they are the future of weeknights. Nobody wants to light anything at 7pm on a Tuesday in February. The convenience gap is too wide to hold, and I expect electric to keep taking share from gas over the next couple of years.
The Ooni Koda line sits in the same gas category as the oven above, and it is idiot-proof, which is a compliment. It is not in this guide because this guide is about the setup routine, and the routine is identical across every oven in the class. Buy the oven that fits your patio. Then run the steps above.
What this all costs
The oven is the big line item and the cover is the small one, and that ratio is the whole point. Whatever you spend on the oven, the cover costs a fraction of it, and the cover is the piece that decides whether the burner still lights after two winters. Skipping it to save a little is a bad trade, and it is the trade most people make.
The accessories that are genuinely worth adding are short: a peel you can shake, a turning peel, an infrared thermometer, and a cover. That is it. Everything else in the pizza accessory aisle is solving a problem you do not have yet. If you are budgeting, buy the oven and the cover now, and add the peels before your first dinner party rather than after.
The bottom line
A pizza oven is a heat machine. The dough, the sauce, the cheese, all of it is just there to not get in the way. Your job on the first night is not to make a great pizza. Your job is to learn where the hot spot is and how long the stone takes to come back. The first pie is reconnaissance. The second one tells you what you bought.
Get the stone hot, launch with confidence, rotate once, and shut it down slowly. Do that four or five times and you will stop thinking about the oven entirely, which is exactly where you want to be.