An outdoor pizza oven setup is mostly a heat problem, and heat problems get solved before the first pie ever touches the stone. You can have a great dough and a great sauce and still pull a pale, gummy bottom because the stone never got hot, the wind pushed the flame sideways, or you launched thirty seconds too early. I have watched all three happen on ovens that cost more than my first car.
The order that works: choose the fuel, site the oven, cure it, find its hot spot with an infrared thermometer, then cook. The two ovens below are the two ends of that choice, a propane oven with a rotating stone and a wood burning firebrick kit you build yourself, and the setup steps are almost identical for both.
Why you should trust me
I worked the oven at a Neapolitan pizzeria for five years before I moved to food writing, and I have tested eight pizza ovens in three years, from a countertop box to a wood fired dome. Every pie gets scored on the same card: char, leoparding, rim rise, bottom crisp. I keep the photos.
Two rules I hold to. I will not review an oven without cooking at least eight pies in it. And I cook the same two test recipes every time, a 48-hour cold-fermented dough and a plain marinara, so results compare across ovens. Loaned units get disclosed. If I say an oven tops out at 650 F, it is because my infrared thermometer read 650 F, not because the box said 900.
That honesty cuts both ways, so here it is plainly: I have not cooked on either of the two ovens in this article. They are here on their published kit lists and specs, because the setup steps are what you came for and the kit list is what you are actually buying. Where I have not verified something, I say so.
How I picked these two
These two sit at opposite ends of one question: how much work do you want to do for a pizza?
I judged them on five things. Fuel and how it arrives at the oven. Whether the stone moves or you move the pie. What is actually in the box, line by line, since a kit that includes the peel and the stone saves a separate shopping trip. The assembly burden, meaning how much of your Saturday disappears. And whether the oven has a real heat ceiling or just a number printed on the lid.
That last one is the whole ballgame. A 12-inch oven that genuinely holds high heat beats a bigger oven that struggles, every single time. Temperature range is the spec that matters, and it is the spec marketing copy is most willing to fudge.
The two ovens
Weeknight pick: NutriChef Outdoor Pizza Oven with 360° Rotating Pizza Stone
 Visit on Amazon →
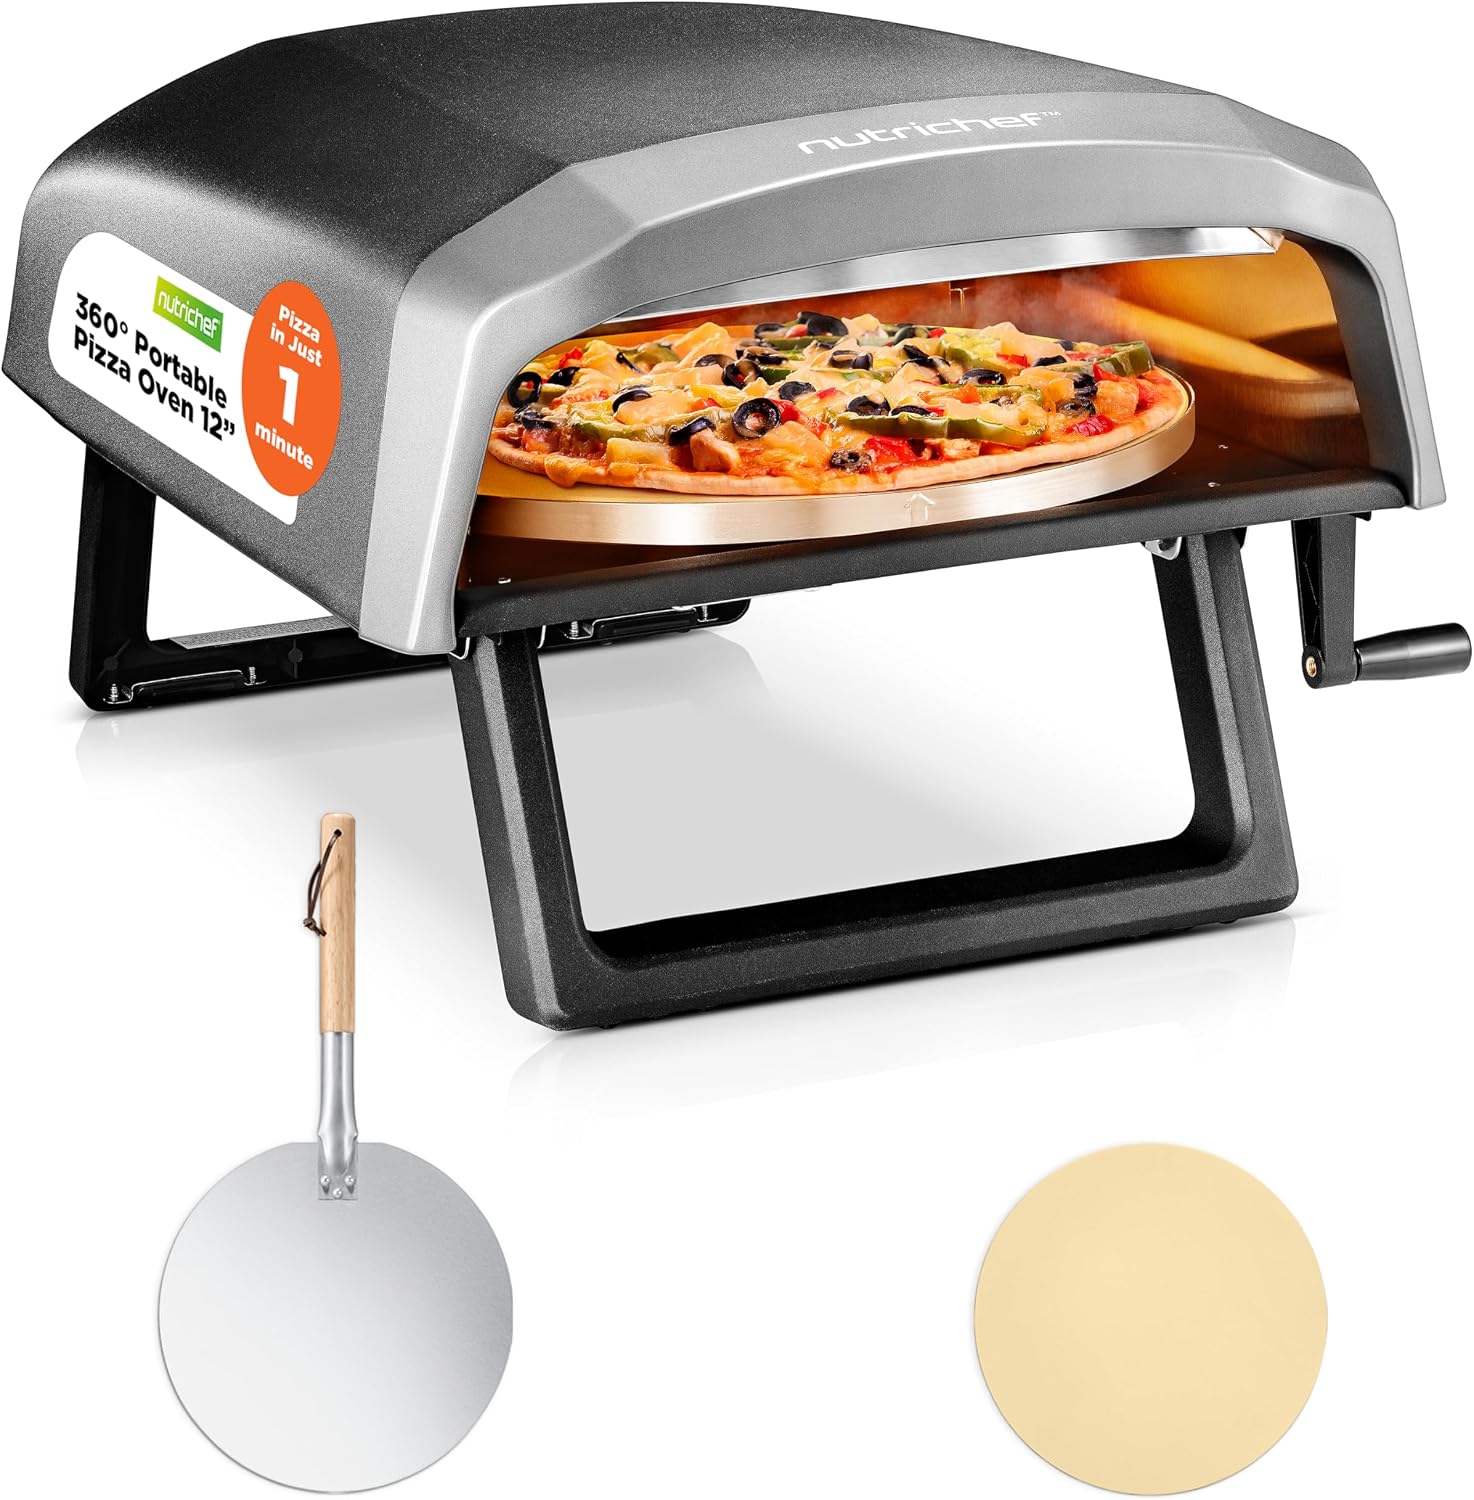
This is the oven for a Tuesday. It runs on propane, with the regulator and hose included, so you supply a standard tank and nothing else. The stone rotates a full 360 degrees while the pie sits on it, which is the feature that matters most here. On a fixed-stone oven you are turning the pie by hand every thirty seconds or you eat a burnt edge and a blond edge. On this one the stone does that work while you watch through the mouth.
The adjustable heat dial is the second thing I like. You can back it off for a second pie without killing the stone, which is exactly the move that keeps pizza night from turning into a two-pie event. The kit includes a peel and the stone, and the peel has a short handle, which tells you the intended use: stand close, launch, watch, done.
The maker claims a 12-inch pie in about 60 seconds. Treat that as a target, not a promise. Your time depends on how long the stone preheated, how cold your dough was, and whether the wind is on your side. The only number that counts is the one your infrared thermometer reads off the stone.
Flaws but not dealbreakers: A single dial means one temperature for the whole session, so there is no running a hot floor and a cooler dome the way a wood oven does. The rotating mechanism is one more part to keep clean, and melted cheese on a spinning stone is a mess you will only make once. Propane also means a tank to haul and store.
Anyone cooking weeknights on a deck or a small patio, who wants pizza twenty minutes from a cold start, should start here.
Weekend build: BRAVO Wood Burning Fire Brick Pizza Oven, Fully DIY Kit
 Visit on Amazon →
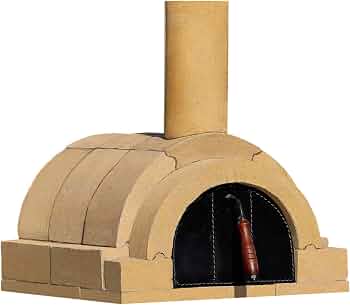
This is not an appliance. It is a small masonry project that arrives in a box. The kit includes the firebrick set, refractory glue, a trowel, gloves, a cover, a steel gate, and assembly instructions, and the listing puts assembly at about three hours. Believe the three hours for the assembly, then add cure time on top, because the refractory glue has to dry slowly or it cracks. More on that in the steps below.
What you get for the work is a wood oven with real thermal mass. Firebrick holds heat and gives it back, which is why a brick oven cooks a pie in the time it takes to say so and then keeps cooking for an hour after the fire dies. You also get the thing no gas oven can copy: a fire you tend, and what comes off it.
What you give up is convenience in every direction. There is no dial. Heat management is you, the wood, and the size of the fire. There is no lid you close on a pie, just the steel gate, so you are working with a live flame the whole time. And the footprint is permanent. Once it is built and cured, it lives where you built it.
Flaws but not dealbreakers: Weather matters more here. Wind and rain will change your night, and a brick oven that has soaked up a week of humidity needs a longer, slower warm-up. The learning curve is steeper, and your first three pies will prove it.
Anyone who wants the Saturday ritual, has a permanent spot in the yard, and does not mind mixing refractory glue should look at this kit.
The setup, step by step
Now the part you came for. These steps work for both ovens, and the differences are called out.
Step one: site the oven. Flat, level ground, away from anything that can catch. Vinyl siding, a wooden fence, dry grass, and a low tree branch are all things I have seen get scorched. Give yourself room to stand behind the oven with a peel, and put the oven where the prevailing wind hits the back, not the mouth, because wind across the opening pulls flame and heat out the front.
Step two: fuel. For the propane oven, connect the regulator and hose, then do a leak test. Soapy water on every joint, open the tank valve, watch for bubbles. Bubbles mean stop. For the wood oven, use dry hardwood, split small, and skip softwood, green wood, and anything painted, glued, or pressure treated. Small dry pieces give you fast heat and a clean flame.
Step three: cure it, or break it in. The gas oven wants a short low burn, maybe twenty minutes, before you cook. The brick oven wants more patience: a series of small fires, each a little bigger, spread over a day or two, to drive moisture out of the refractory glue. Rush this and you will hear the mortar crack, and that crack is permanent.
Step four: find the hot spot. This is where the infrared thermometer earns its place. Shoot the stone in the center, then near the mouth, then near the back. Every oven has a gradient, and knowing yours is the difference between two good pies and a night of guessing.
Step five: dough, before anything else. Cold dough tears and sticks. Pull your dough balls out of the fridge an hour or two before you cook, and shape them by hand, leaving the outer inch alone. That rim is where your leoparding lives. A rolling pin flattens the gas out of the rim and you get a cracker.
Step six: the launch. Dust the peel with semolina, or a semolina and flour mix, and shake the peel between every topping addition. If the pie sticks, lift an edge and blow under it. A peel with a lip is worth the money. A flat peel with no lip drops pies.
Step seven: the turn. On the rotating stone oven, let the mechanism do it, but still check at thirty seconds. On the brick oven, turn the pie a quarter turn every twenty to thirty seconds with the peel or a turning tool. Edges nearest the fire burn first.
Step eight: the first pie is a throwaway. Plan for it. The first pizza tells you what your stone temp actually is, how fast the oven recovers, and whether your launch technique holds up under pressure. It is not dinner. It is data.
Step nine: shut it down right. Gas first: close the tank valve, then the dial, so no gas sits in the line. Wood: let the fire burn down, close the gate, and cover the oven once it has cooled enough that the cover will not scorch.
What goes wrong on the first night
Cold dough is the most common failure and the easiest to fix. Give it the hour.
Wet mozzarella is second. Fresh mozzarella carries a lot of water, and on a fast bake that water becomes a puddle in the middle of your pie. Tear it, drain it on paper towels, and use less than you think.
Too much sauce is third. A thin layer, and leave a bare border for the rim.
Between pies, give the stone a minute to recover. Pulling one pie and launching the next immediately is how you get a gummy second pie after a perfect first one. On the rotating oven recovery is faster, but it is not zero.
And do not cook in a hurry with a wet dough, a cold stone, and a headwind. That combination has never once produced a good pizza, in any oven, at any price.
Accessories worth having, and what to skip
An infrared thermometer, a peel with a lip, a bag of semolina, and a dough scraper cover nearly everything. A turning tool helps on the wood oven.
What I would skip: seasoning kits, pre-made sauce that costs more than the tomatoes, and any gadget that promises to fix a problem you do not have yet. Half the accessories in this category exist to be sold, not to be used.
The competition, briefly
You will see other names. The Ooni Koda line is about as idiot-proof as gas gets, and the Karu is for people who like tending a fire. Gozney builds like restaurant equipment and prices accordingly. Indoor electric ovens are the ones to watch, because nobody wants to light a fire at 7pm on a Tuesday, and the electric class keeps getting hotter every year.
None of that changes the steps above. A pizza oven is a heat machine, and the dough, the sauce, and the cheese are just there to not get in its way.
What this all costs
I am not quoting prices, because they move and I would rather you check them than trust a number I typed months ago. Check current Amazon price at each link above and you will see the shape of it: the propane oven is the entry point, and the firebrick kit is a multiple of it, before you count fuel, a thermometer, and a peel.
The honest math is per pie. If you cook forty pizzas a year for three years, that is 120 pies, and the oven becomes the smallest part of the cost once you add propane, wood, flour, and cheese. What you are really buying with the brick kit is the ritual and the thermal mass. What you are buying with the propane oven is a Tuesday.
Either way, the first pie is bad. The second one tells you what you bought.