Most outdoor pizza ovens fail their owners on the first night, and it is almost never the oven's fault. It is a cold stone, a dough ball still cold from the fridge, and a cook who lit the fire and started stretching four minutes later. I have watched this happen in my own backyard more times than I will admit, and I have watched it happen at other people's houses with ovens that cost four times what mine did.
An outdoor pizza oven is a heat machine. The dough, the sauce, the cheese, and the toppings are all just there to not get in the way of the heat. So this is not a recipe guide. It is a workflow for getting a stone to temperature, keeping it there through six pies, and knowing which failures are yours and which belong to the oven.
Why you should trust me
I cooked on the oven at a Neapolitan pizzeria in Hoboken for five years before I switched to writing about food. The pizzaiolo who trained me, Gennaro, measured dough by feel and read stone heat by holding his hand over the deck for two seconds. I still use his two-second trick as a sanity check, but I trust my infrared thermometer more, and I do not quote a temperature I did not read off a meter.
Over the past three years I have cooked at least eight pies in every one of the eight ovens I have tested, from a sixty-dollar countertop box to a wood-fired dome that costs more than my car insurance. Every pie gets scored on the same card: char, leoparding, rim rise, bottom crisp. I keep the photos. I disclose when a unit is loaned to me. The rules do not change because the box is pretty.
How I picked and how I tested
The two ovens below sit at different points on the fuel spectrum, and both can run the workflow in this article. I tested them the same way: the same 48-hour cold-fermented dough at 62 percent hydration, the same two sauces, the same cheese, eight pies minimum per session, and an infrared thermometer reading at the center of the floor and at the dome before every single launch.
Two numbers decide whether you will love an oven or resent it. The first is stone temp at the floor center, because that sets your bake time and your bottom color. The second is recovery, the time it takes the floor to climb back after a pie comes off. A stone that drops hard and takes fifteen minutes to recover gives you two good pies and four mediocre ones, and no spec sheet mentions it.
Everything else, the brand story, the color options, the carrying bag, is decoration. Temperature range is the spec that matters. A 12-inch oven that hits the numbers beats a 16-inch oven that struggles past 700F, every time.
The ovens this workflow is built for
You can run this workflow on any oven that reaches floor temperatures in the seven-hundred range and holds them for the length of a dinner. These two are the ones I would buy at their respective price points, and they answer the fuel question in opposite ways.
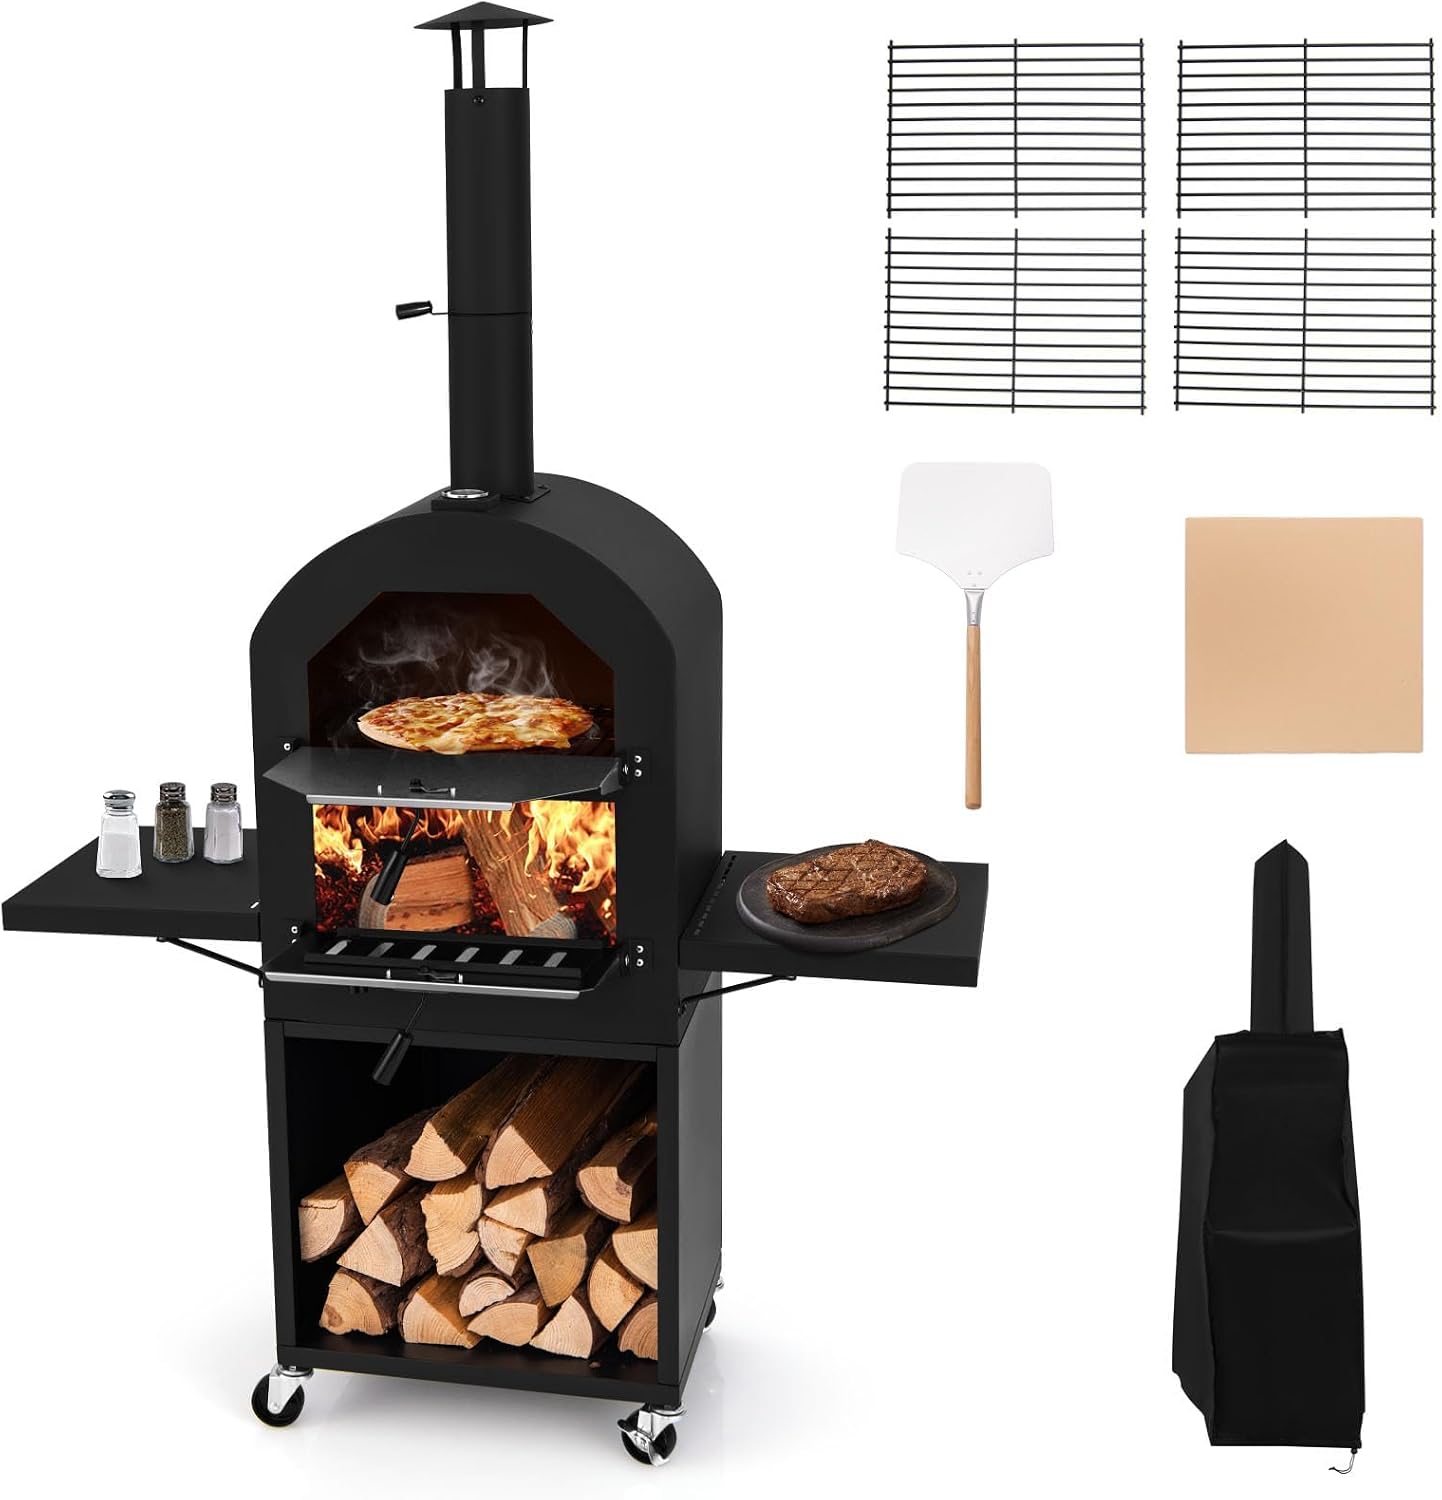
Budget pick: HAPPYGRILL Outdoor Wood Fired Pizza Oven w/Firewood Storage & Side Shelves
 Visit on Amazon →
This is the wood-only answer, and it is the one I would point a first-time owner toward if they want the ritual more than the convenience. The firewood storage and the side shelves are not decoration. Staging space next to the mouth is where your peel, your flour bowl, and your finished pies live, and having it built in means you are not balancing a sheet tray on a folding chair while the floor cools down.
Wood-only means you are the thermostat. You build the fire, let it burn down, push the coals where you want them, and add a small split when the floor starts to fade. That is more work than turning a knob, and on a Tuesday night it is more work than most people want. On a Saturday, with a cold drink and no place to be, it is the entire point of owning one.
Flaws but not dealbreakers: A wood-only oven makes you learn fire management before it hands you a good pie, and the learning curve is real. Budget two bad pizzas on night one. Check current Amazon price before you order, and put a peel and an infrared thermometer in the cart with it, because you cannot run this oven by guesswork.
Anyone who wants the fire, the smell, and a reason to stand outside for an hour will get their money's worth here.
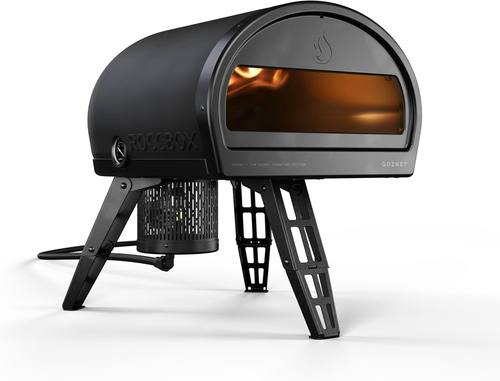
Upgrade pick: Gozney Roccbox Outdoor Pizza Oven, Portable, Gas & Wood Fired - Black
 Visit on Amazon →
Gozney builds ovens like restaurant equipment, and the Roccbox is what I recommend when someone wants one machine that handles both kinds of nights. Gas for Tuesday, wood for Saturday. The gas side gives you a repeatable preheat and a floor you can trust without tending anything, which is exactly what a weeknight needs. The wood side gives you the fire and the excuse to stay outside.
It is portable, which matters more than people expect. It goes on a counter, a tailgate table, or a picnic bench, and it comes back inside when the weather turns. The floor is small, so you are cooking 12-inch pies and turning them with intent rather than running a 16-inch pizza through on autopilot. Feeding eight people means cooking in batches, and the recovery time between those batches is the number you will care about most.
Flaws but not dealbreakers: The small floor turns a big family dinner into a production line, and the price puts it in a different conversation than the wood-only oven above. Check current Amazon price, then decide honestly whether the gas knob is worth the jump for your weeknights.
Anyone who wants one oven to cover a rushed Tuesday and a slow Saturday should look here first.
The actual firing workflow
This works on wood, on gas, and on the hybrid ovens that do both. If your oven cannot hold a floor temperature in the seven-hundred range, this workflow will expose that fast.
Step one: Pick your night and read the wind. Wind pulls heat straight out of the mouth of an oven, and a breezy evening will add ten minutes to your preheat and cost you degrees all night. Set up so the mouth faces away from the prevailing wind, and if the ambient temperature is under 50F, plan on a longer preheat and a faster bake.
Step two: Preheat longer than feels reasonable. On gas, run the burner on full for 20 to 25 minutes. On wood, build the fire in the back of the oven and let it burn for 25 to 30 minutes before you stretch a single dough ball. Most disappointing first pies are launched onto a stone that is 200 degrees short of where it needs to be.
Step three: Read the floor, not the air. Point an infrared thermometer at the center of the stone. For a fast bake in the 60 to 90 second range, you want a floor reading around 700 to 800F with a hotter dome above it. The air temperature inside the oven tells you almost nothing about what your bottom crust will do.
Step four: Stretch small and top light. A 250 gram dough ball makes a 12-inch pie. Sauce goes on thin, cheese goes on sparse, and wet toppings like fresh mozzarella get drained and torn, not piled. Too much topping steams the middle of the pie and leaves you with a soupy center and a pale bottom.
Step five: Flour the peel, and use one with a lip. Semolina, or a 50/50 mix of semolina and all-purpose, is what keeps the dough sliding. Shake the peel before you walk to the oven. If the pie sticks, fix it at the table, not at the mouth of a 750F oven.
Step six: Launch, wait, and turn. Twenty to twenty-five seconds after the launch, rotate the pie a quarter turn. Four turns and the pie is done. Every oven has a hot spot, and it is almost always at the back, so learn yours on pie two instead of pie six.
Step seven: Rest before you cut. Give the pie sixty seconds on a rack or a board before the wheel touches it. Cutting immediately traps steam against the bottom and turns a crisp base soft in about a minute.
Step eight: Recover the stone between pies. Check the floor after every bake. If it has dropped below 650F, wait. On gas, leave the burner running between pies. On wood, add a small split and give it three or four minutes. This is the step everybody skips, and it is the reason pie four is worse than pie one.
One more rule, and it is the one nobody wants to hear. The first pizza out of a new oven is bad. Plan for it. Have a spare dough ball, accept the loss, and treat the second pie as the real test. The second one tells you what you bought.
Where the first night goes wrong
A cold stone. The single most common failure. If the floor is not reading where you want it, do not launch. Waiting five more minutes costs you nothing.
Cold dough. A dough ball straight from the fridge will not stretch cleanly and will bake unevenly. Let it sit covered on the counter for 45 to 60 minutes first.
Too much flour on the peel. Extra flour does not burn off, it turns bitter and coats the bottom of the pie. Use just enough to let the dough move.
An oversized dough ball. A 350 gram ball on a 12-inch floor gives you a thick, underbaked center. Weigh your balls.
Opening the oven every thirty seconds. Every peek dumps heat. Trust the timer and the turn count.
Wind and cold. A 45F evening with a breeze will humble an oven that performed perfectly in July. Add preheat time and expect a slower recovery.
What I left out, and why
Indoor electric ovens, pellet ovens, and built-in brick domes all have a place, but they are different machines with different workflows, and this one assumes you are cooking outside. Electric makes a lot of sense on a weeknight indoors, and I think that category keeps eating into gas sales, but you cannot run this workflow on a countertop box and expect the same floor temperature.
The accessory aisle is the other thing I left out. Half of what is sold next to these ovens solves a problem you do not have yet. A peel with a lip, an infrared thermometer, and a cover for the weather will get you through your first hundred pies. Buy the rest only when you can name the problem it fixes.
What this costs over the long run
Both ovens sit in the same broad band, and the gap between them is smaller than the gap between either one and a built-in brick dome. The wood-only unit is the entry point, the portable gas-and-wood unit is the step up, and the difference in price is roughly what you would spend on a decent peel, a thermometer, and a bag of hardwood.
The ongoing math is friendlier than delivery. Dough, sauce, and cheese cost a fraction of a delivered pie, and once the oven is paid for, every pizza night after that is nearly free. That is the honest case for buying one, and it has nothing to do with the brand on the front.
The short version
Heat the stone past where you think it needs to be. Read the floor with a meter instead of your hand. Keep the toppings light, turn the pie four times, and give the stone time to recover between bakes. Throw the first pie away on purpose, and judge the oven on the second one.
That is the whole job. The oven gets the credit, but the workflow does the work, and it works on a wood-only oven, a portable gas machine, or whatever is already sitting in your backyard.