Most people buy a backyard pizza oven, light it, bake one pie, and blame the oven when the crust comes out pale and leathery. It is almost never the oven. A backyard pizza oven is a heat machine, and the cook is the thermostat: stone temp, fuel, preheat time, and where the pie sits in the chamber decide more about the final crust than the badge on the door.
I spent five years working the oven floor at a Neapolitan pizzeria in New Jersey before I switched to writing about food, and I have tested eight pizza ovens over three years, from a cheap countertop box to a wood-fired dome. This guide is the whole method: how to choose between a wood-fired patio oven and a multi-fuel one, how to get the stone hot enough, and how to bake your first ten pies without throwing away a batch of dough.
Why you should trust me
I measure things. Every oven that comes through my yard gets the same two dough recipes, a 62% hydration direct dough and a 48-hour cold ferment, and every bake gets scored on a card: char, leoparding, rim rise, bottom crisp. Nothing gets written up without an infrared thermometer reading pointed at the stone, because "it felt hot" is how ovens that claim 900F on the box end up topping out at 650F.
I also have a bias and I will name it up front: the oven gets the credit, but the dough does the work. A 48-hour cold ferment will beat any upgrade under a few hundred dollars. If you take one thing from this article, take that one.
What actually matters in a backyard pizza oven
Four specs decide whether you have a real pizza oven or a hot box with a stone in it.
Stone temp, not air temp. The air in the chamber can read 900F while the stone sits at 600F, and the stone is what bakes the bottom. This is the number one reason home pizzas come out with a burnt rim and a doughy center.
Thermal mass. A thick cordierite or biscotto stone holds heat through the bake and recovers fast enough to launch a second and third pie. A thin stone dumps its heat into the first pie and then sulks. This matters more than deck size.
Recovery. The gap between pie one and pie two is where cheap ovens quit. If the stone drops 150F per bake and takes 12 minutes to come back, your dinner takes two hours.
Fuel. Wood tastes better, gas is easier, and the right answer depends on the night, not the brand. Gas for Tuesday, wood for Saturday. Anyone who tells you one is objectively better has not cooked a full dinner on both.
Deck size is the last thing to worry about, and it is the one shoppers obsess over. A 12-inch oven that hits 900F beats a 16-inch oven that struggles past 700F every single time. Buy temperature range first, footprint second.
The two ovens in this guide
Two very different answers to the same question. One is the classic wood-fired patio route. The other is the multi-fuel machine with a real brand behind it. Both are outdoor ovens, both need the same dough, and the decision comes down to which night you are cooking.
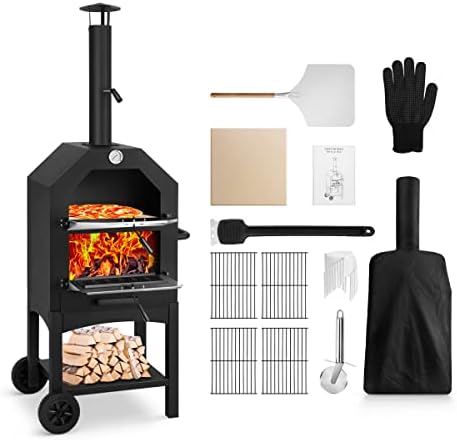
The wood-fired patio route: Outdoor Wood-Fired Pizza Oven Patio Pizza Maker for Backyard
 Visit on Amazon →
This is the entry point into live fire in a backyard: a wood-fired patio oven, the kind you light, feed with split hardwood, and cook from directly. What it buys you is ritual and radiant heat from an actual flame, which is a different kind of heat than a gas burner produces and shows up in the crust as faster rim rise and better spotting on the underside.
Before you order, answer four questions. Does it ship with a pizza stone, or do you need to buy one that fits the deck? What is the deck size compared to the peel you already own, because a 12-inch pie on a 12-inch deck with no lip is a pie you will drop? How does it vent, and how far does the opening or chimney need to sit from a fence, a wall, or an overhang? And how much does it weigh when you factor in the stand or the table it will live on?
Check current Amazon price to see where it lands, then compare that against the cost of fuel and a decent peel.
Flaws but not dealbreakers: At this end of the market the compromise is usually thermal mass and door seal, which shows up as slower recovery between pies. The fix is a longer preheat and feeding the fire earlier in the process, not a second oven.
Anyone with a yard, a stack of dry hardwood, and Saturday nights free will get real pleasure out of the wood-fired route. This is the oven for the person who wants to tend something.
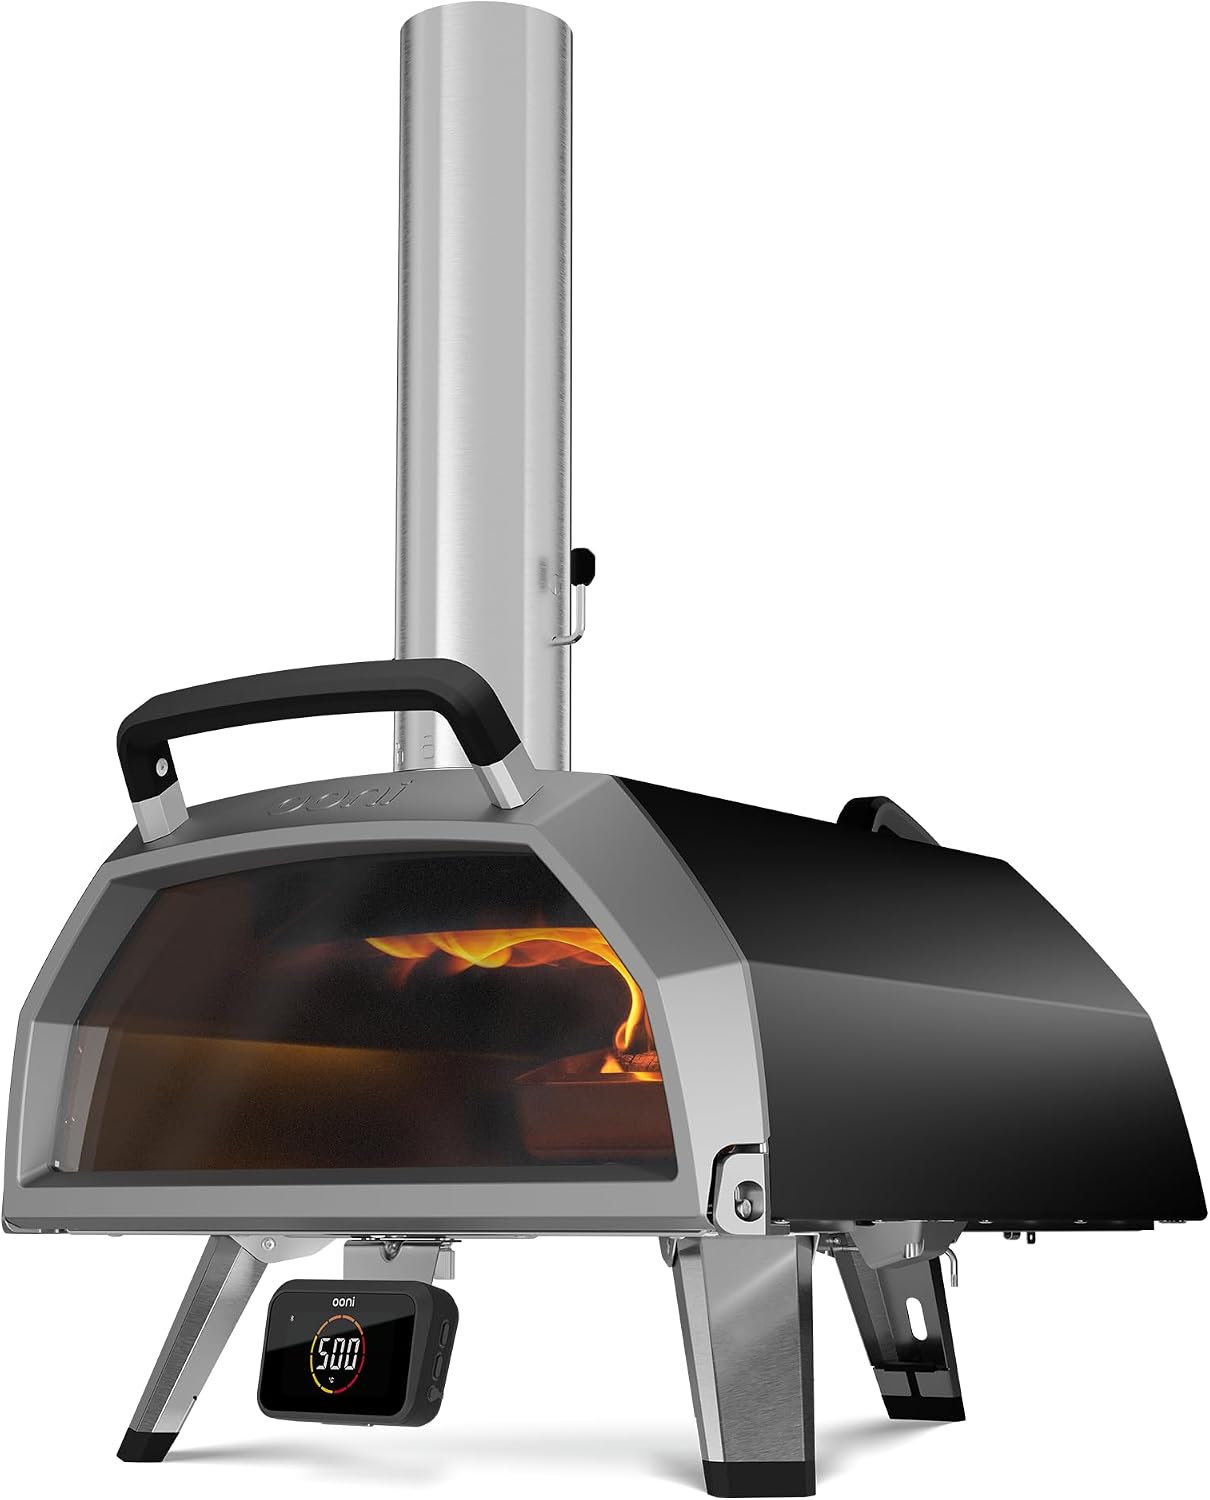
The dual-fuel upgrade: Ooni Karu 2 Pro Multi-Fuel Pizza Oven - Wood and Gas Outdoor Pizza Oven with Pizza Stone & Integrated Thermometer, Pizza Oven Outdoor, Dual Fuel 16 Inch Pizza Maker, Outdoor Cooking Grill
 Visit on Amazon →
Ooni is the brand that made backyard pizza a thing, and the Karu is the line for people who like tending fires. The 2 Pro runs on wood or gas, ships with a pizza stone, and includes an integrated thermometer, which tells you Ooni understands the two failure modes of home pizza: cold stone and nobody watching the chamber.
The 16-inch deck is the honest upgrade here. Bigger deck means bigger pies, but it also means room to work, and room to work means you can rotate a pie without dragging the rim across the stone. That matters more on your fifth bake than your first.
One caveat about the integrated thermometer: it reads the chamber, not the stone. Chamber temp is useful for judging when the oven is up to heat and when it is overshooting, but the number that bakes the bottom of your pizza is still the stone, and you still want an infrared thermometer for it. Use both.
Check current Amazon price before you decide, and factor in whether you already own a propane tank and a regulator setup.
Flaws but not dealbreakers: Multi-fuel means the oven does two jobs well and neither one perfectly. Gas will not give you the same flame-driven char as wood, and wood takes attention. Also, a 16-inch oven wants a 14-inch peel to load comfortably, so budget for that if your current peel is small.
This is the oven for the cook who wants one machine that handles a Tuesday gas bake and a Saturday wood fire without owning two ovens.
The actual bake workflow, step by step
This works on either oven above, and on most ovens you will ever own. Do it in order.
Step one: Make the dough before you shop. A 48-hour cold ferment dough, 250 grams per ball, 62 to 65% hydration for a bake in the 800 to 900F range. Higher hydration is not automatically better in a very hot oven; it makes the pie harder to launch. Get a dough you have made ten times before you invite anyone over.
Step two: Stage the oven before you light it. Level, non-combustible surface, clear of walls, fences, and anything overhead that could get hot or catch. If it lives on a wood deck, decide now whether it stays there permanently or gets wheeled out on pizza night, because a hot oven sitting in one spot all summer is a different decision than a hot oven you move twice a week.
Step three: Cure a new oven, then preheat longer than feels reasonable. A brand new oven needs a break-in fire to burn off manufacturing oils. After that, give it a 30-minute minimum of full heat before the first pie, and closer to 45 minutes for a wood-fired dome. The single most common mistake in home pizza is a short preheat.
Step four: Read the stone, not the air. Point an infrared thermometer at the stone center. For a 60 to 90 second bake, aim for 750 to 850F. If you are chasing Neapolitan leoparding, you want the back of the stone near 900F and a live flame over the top.
Step five: Stretch, do not roll. Press from the center out, leave the outer inch and a half alone so the rim can rise, and use bench flour only at the very end. A rolling pin crushes the gas out of the dough, and that gas is the entire point of the ferment.
Step six: Load light. A dusting of semolina on the peel, sauce and cheese in modest amounts, and one quick confident motion into the oven. Heavy toppings are what make a pie stick to the peel and turn into a calzone on the stone.
Step seven: Bake, then rotate. Give it 25 to 30 seconds, then a quarter turn. Three turns gets you a full rotation. On a wood oven, keep a small live flame at the back and slide the pie forward if the rim is darkening faster than the bottom is setting.
Step eight: Rest the pie on a rack, not a plate. Two minutes on a wire cooling rack keeps the bottom crisp. A plate traps steam and undoes the whole bake.
Step nine: Check recovery before pie two. Wait for the stone to come back to temp, and add fuel before you are desperate rather than after. Recovery time is what separates a two-pie oven from a ten-pie oven.
What goes wrong and how to fix it
Pale bottom, charred top. Stone is too cold and the top heat is doing all the work. Longer preheat, more infrared readings.
Burnt rim, wet center. Too much top heat and too heavy a topping load. Move the pie forward in the chamber and pull back on the sauce and cheese.
Stuck pie. Too much flour on the peel or too much sauce on the dough. Shake the peel before you launch, every time.
Gummy texture. Underfermented dough, not an oven problem. Give the dough the time it asks for.
Stone drops 200F after pie one. Thin thermal mass. Add fuel earlier and give it the full recovery window.
When a different oven is the right call
If you cook on weeknights, an indoor electric oven makes more sense than anything you have to light. Nobody wants to build a fire at 7pm on a Tuesday.
If you want gas only, skip the multi-fuel decision entirely and buy simpler. If you want wood only, that is a hobby decision as much as a cooking one, and the wood-fired patio route is where you start.
And if you only have room for a small oven, take the small oven that runs hot. Temperature range is the spec that matters. Everything else is a floor plan problem.
What it costs to run
The oven is the big line item, and both of the ovens above list at Check current Amazon price, so compare them there rather than in a blog post that goes stale.
After the oven, the real costs are fuel, dough, and two accessories: a peel and an infrared thermometer. Half the accessories sold for pizza ovens are solutions to problems you do not have yet. A peel with a lip and a thermometer cover most of it. Everything else can wait until you have baked twenty pies and know what you actually want.
The math that matters is cost per pie. The more pies you bake, the cheaper the oven gets, and the better your dough gets, which is the only upgrade under a few hundred dollars that reliably improves the pizza.
The bottom line
Light it early, read the stone with a thermometer, bake a pie you have practiced with, and rotate it. That is the whole job. Your first pizza in a new oven will be bad, so plan for it and use dough you do not care about. The second one tells you what you bought.