Most people blame the dough when the first pie comes out pale, gummy in the middle, and soft on the bottom. It is almost never the dough. A propane pizza oven is a heat machine, and if the stone is not already loaded with heat when you launch, the best 48-hour cold ferment in Hudson County will not rescue that pie.
I cooked the oven at a Neapolitan pizzeria for five years before I switched to writing about food, and the lesson that followed me home is unglamorous. Setup beats talent. The oven has to sit in the right place, the gas has to be connected correctly, the stone has to be saturated, and you have to know your actual stone temp before you touch a peel. Everything after that is technique you can practice on a Tuesday.
This is the order of operations I use for any gas oven, from a small portable up to a 25-inch two-burner deck. Do it once and it turns into a 25-minute routine: place, connect, preheat, read, launch, rotate, recover, shut down. The first pizza you make in a new propane pizza oven will probably be bad. Plan for that. The second one tells you what you bought.
Why you should trust me
I spent five years on a commercial deck in New Jersey, which means I have launched somewhere north of 40,000 pies and I have burned my forearms in ways I do not recommend. I live in Hoboken, two blocks from a pizzeria that has been running since 1948, and the guys there still measure dough by feel. I do not, mostly because I write things down.
Over the past three years I have cooked on eight pizza ovens, from a $60 countertop box to a wood-fired dome, and I score every single pie the same way: char, leoparding, rim rise, and bottom crisp. I keep the photos, which is more embarrassing than it sounds. I own an infrared thermometer and I do not trust a dial, a marketing number, or a box that claims a temperature the stone never reaches. If you take one habit from this guide, take that one.
How I picked and how I tested
Every oven that comes through my yard gets the same two doughs: a direct 62% hydration dough I can mix after work, and a 48-hour cold ferment at 65%. Same flour, same crushed tomatoes, same low-moisture mozzarella, same basil. When the variables change, the comparison stops meaning anything.
I judge on four things. How fast the stone comes up to temperature with all burners wide open. How much the deck drops when a cold dough hits it, and how long it takes to climb back. Whether the rim leopards or just burns in one spot. And whether the bottom comes out with an even bake or a bullseye. I take infrared readings at the center of the deck and again near the mouth, because on most gas ovens those two numbers are not close, and that gap is where bad pizzas come from.
The two items below are the ones this guide is built around. One is the oven class I am writing for. The other is the accessory question I get most often from owners of a specific 16-inch oven, and I would rather answer it here than in my inbox for the tenth time.
The two pieces of gear that decide the first bake
You can fix a lot with technique. You cannot fix a stone that never gets hot, and you cannot fix a deck that bleeds all its heat into a 15 mph wind while you shape your second pie. That is what these two pieces of gear are for.
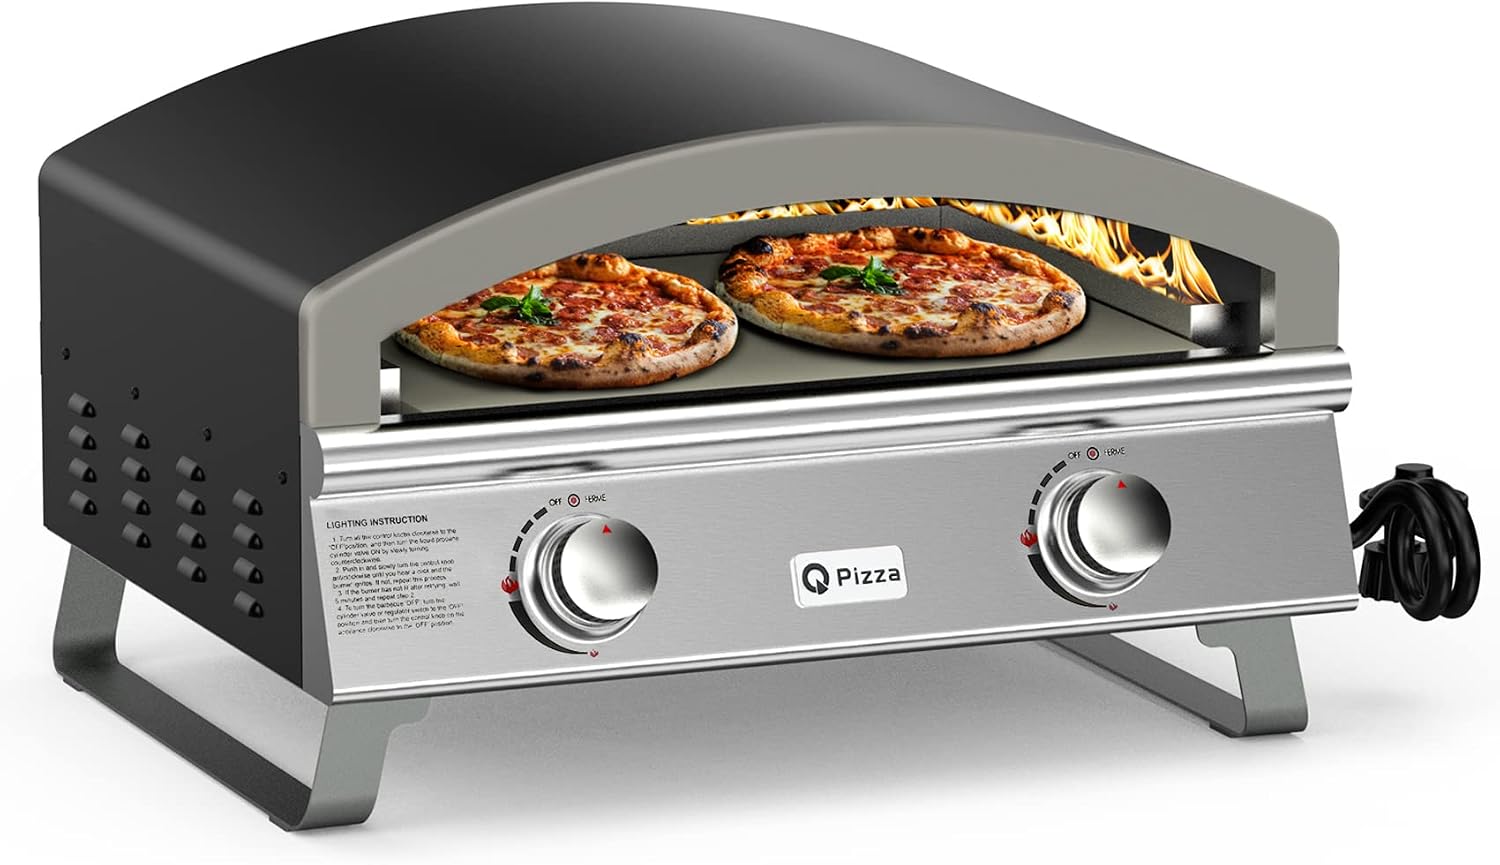
The oven: 25" Large Propane Pizza Oven, 2-Burner Gas Pizza Maker, PS103
 Visit on Amazon →
A 25-inch deck with two independent burners is the configuration I would hand most home cooks, and the reason is control rather than size. Two burners means you can run the one under the stone hot while the one at the back gives you top heat, then dial the floor burner down the second your pie lands. On a single-burner oven you get one knob and one compromise, which is how you end up with a black bottom and a blonde top.
The 25-inch deck is also the practical part. A 12 to 14 inch pie has room to be rotated with a turning peel without hitting the walls, and you can work two pies back to back instead of one every six minutes. Propane is the fuel I recommend for weeknights for the same reason I recommend a gas range: it is on the moment you want it and off when you are done. No kindling, no ash, no 40 minutes of fire tending before dinner.
What to plan for before it arrives: a level, non-combustible surface outdoors with clearance on all sides, a full propane tank, and somewhere out of the wind if you have the option. Check current Amazon price before you commit, and check what the listing includes, because hose and regulator arrangements vary by seller.
Flaws but not dealbreakers: Propane is weather sensitive. A tank in cold air delivers less pressure and a smaller flame, so a 30F night will not behave like a 75F night. If you cook year round, keep a spare tank inside and swap it in.
Anyone feeding a family on a patio, a driveway, or a deck where they want pizza on a weeknight without a fire ritual will get the most out of this class of oven.
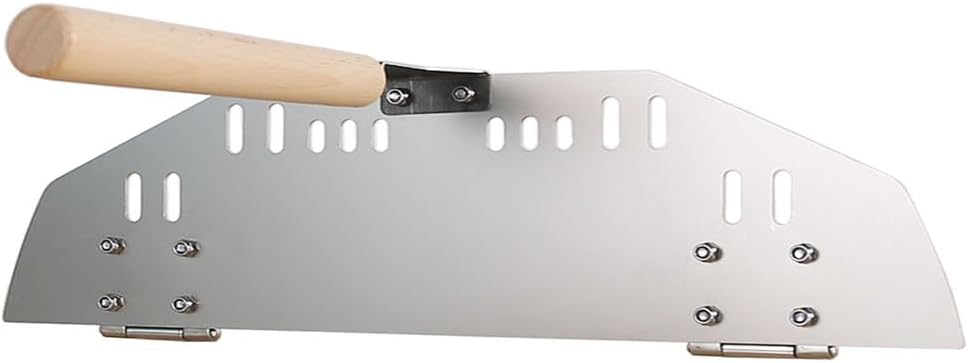
The heat trap: Pizza Oven Door for OONI Koda 16 inch, Stainless Steel Oven Door for OONI Koda 16 inch
 Visit on Amazon →
This one is not universal, and I want to be blunt about that before anyone orders it. It is built for the OONI Koda 16, so it is for Koda 16 owners, not for the 25-inch oven above. If you own that specific 16-inch oven, this is the least expensive heat retention upgrade you can make.
Here is the mechanics of why a door matters on a gas oven. Between bakes, an open mouth radiates heat straight into the air, and in a breeze it does it faster. A door closes that opening, so preheat comes up sooner and the stone recovers faster between pies. That recovery is the thing that separates a good first pizza from a good fourth pizza. Stainless will get hot enough to bite you, so keep a glove within reach and treat the handle as a hot surface.
Flaws but not dealbreakers: It fits one oven model. Measure nothing and assume nothing, check the model in the listing against your oven before ordering. And a door is a preheat and recovery tool, not a lid you bake with while the burner is wide open.
Koda 16 owners who cook more than two pies in a session, or who cook in cool weather, will feel this one immediately.
The actual firing workflow
Now the part you came for. This works on any propane oven with a stone and a burner you can turn down.
Step one: Pick the spot. Outdoors only for propane. Level, non-combustible, at least three feet of clearance from siding, railings, and anything that can melt, and never under a roof overhang, in a garage, or on a covered porch with a low ceiling. Wind is the single biggest thief of stone temp, so a corner that blocks the breeze is worth more than any accessory.
Step two: Connect and leak check. Tank valve closed first. Seat the regulator, keep the hose free of kinks, and run soapy water over every fitting. Open the tank, watch for bubbles, close it, and rinse. Never check a gas connection with a flame, and never skip this because you are hungry.
Step three: Preheat with everything wide open. Both burners on high, door or lid closed if you have one. Fifteen to twenty minutes in mild weather, twenty-five to thirty in cold or wind. This is the step people cut short, and it is the step that decides the whole night.
Step four: Read the stone, not the dial. Point an infrared thermometer at the center of the deck. Aim for 700F to 800F for a roughly 90-second bake, and 850F and up if your dough is a lean 60 to 62% Neapolitan. Then read near the mouth, because it is often 100 to 150 degrees cooler than the center. If the center says 550F, nothing else in this guide matters. Keep preheating.
Step five: Turn the floor burner down before you launch. Once the stone is where you want it, drop the burner under the deck to low and keep the top burner running. This is the difference between a baked bottom and a burnt one, and it is the mistake I see most often.
Step six: Flour, launch, and do not linger. Semolina, or a half-and-half mix with AP, dusted light. Shake the peel to confirm the dough moves, then launch in one motion toward the back of the deck. If it sticks, lift the edge and add flour rather than shoving it.
Step seven: Rotate early. First turn at 20 to 25 seconds, then again as needed. You want leoparding, which is small dark spots with blistered edges, not a uniform black char. If the top is pale while the bottom is done, your top heat is too low.
Step eight: Recover between pies. This is where inexpensive ovens reveal themselves. A cold dough drops the deck hard. Give it three to five minutes with the door or lid closed between pies, or you will spend the night chasing a falling stone temp and blaming the oven.
Step nine: Shut down properly. Burners off, tank valve closed, then let the line burn out. Cool with the lid open, cover it once it is cool. If your tank frosts over, that is pressure loss, not a broken regulator. Swap in a warm tank.
What usually goes wrong
Cold dough going onto a hot stone. Let a refrigerated dough ball sit covered for 45 to 60 minutes before shaping, or the center stays dense no matter what the deck reads.
Too much flour on the peel. It does not slide better, it burns into bitter ash on the stone and tastes like it. Light dusting, and shake the peel before you commit.
An open mouth in the wind. If your stone will not hold temp, move the oven before you buy anything else.
Trusting the dial over the thermometer. A knob position is not a temperature. A reading is.
Two pies on the deck at once when you are learning. You cannot rotate two pies and watch two rims. Cook one, learn the timing, then add the second.
The competition and why it lost
Wood-fired ovens are the ones I love and the ones I recommend least for a weeknight. Wood gives you flavor and a ritual, and it also gives you 40 minutes of fire management before the first pie and a deck that swings 200 degrees between bakes. Saturday, absolutely. Tuesday, no.
Pellet ovens sit in the middle. More convenience than wood, less control than gas, and a hopper to feed. Indoor electric ovens are the other real answer, and they have gotten genuinely good for apartment cooking, but they are a different guide and a different room. If you want pizza on a Wednesday after work, gas wins because it is instant on both ends.
The door above is not competing with anything. It is a single-model accessory for the Koda 16, and if you do not own that oven, skip it and put the money into a good peel and an infrared thermometer instead.
What this all costs
Here is the honest math. The oven is the purchase, the propane is the ongoing cost, and everything else is small. A peel, an infrared thermometer, a bag of 00 flour, and a decent tank are the real supporting cast, and none of them cost much relative to the oven itself.
What you are actually buying with a two-burner gas oven is recovery and control, not peak temperature on a spec sheet. What you are buying with a door, if you own the Koda 16, is a shorter preheat and a faster rebound between pies. Check current Amazon price on both links above and run the cost-per-day over the number of pizzas you will actually cook in a year, not the number you imagine cooking in July.
The expensive mistake is buying an oven that tops out below the temperature your dough needs, then spending $200 on accessories trying to fix it. Fix the heat first. The dough, the sauce, and the cheese are just there to not get in the way.
That is the job. Get the stone hot, read it with a thermometer, turn the floor burner down, and let the oven do what you paid it to do.